
Show the formula and working
This kitchen splashback tile calculator works out how many tiles and boxes you need for the wall between your worktop and wall units, counting the actual columns and rows of tiles rather than just dividing the area. It is built for UK and European kitchens measured in metres and millimetres, handles grid and brick bond layouts, allows for grout joints and wastage, and has a feet and inches switch.
Quick answer: Divide the splashback length by the tile width plus joint, and the height by the tile height plus joint, rounding both up. Multiply them, add one tile for every offset row in brick bond, then add 10%. A 3 m by 0.6 m splashback in 200 by 100 mm tiles needs 103 tiles in the kitchen splashback tile calculator.
What Is a Kitchen Splashback Tile Calculator?
A kitchen splashback tile calculator is a tool that counts the tiles needed to cover the wall behind a worktop, hob or sink. Because a splashback is a long, narrow strip, counting whole tiles by row and column is more accurate than dividing the area, as every cut tile at the end of a row still uses a full tile. The formula in plain words: columns = length / (tile width + joint), rounded up; rows = height / (tile height + joint), rounded up; tiles = columns x rows, plus extra for brick bond offsets, minus any large area left out, then plus wastage. Boxes = tiles / tiles per box, rounded up.
How Do You Use the Kitchen Splashback Tile Calculator?
- Enter the Splashback length and Splashback height.
- Enter any Area to leave out, such as a window or a glass panel behind the hob.
- Enter the Tile width, Tile height and Grout joint.
- Choose the Layout: grid or brick bond.
- Set the Wastage and the Tiles per box from the box label.
- Read the tiles and boxes, then open “Show the formula and working” to see each step.


How Many Tiles Do I Need for a Kitchen Splashback?
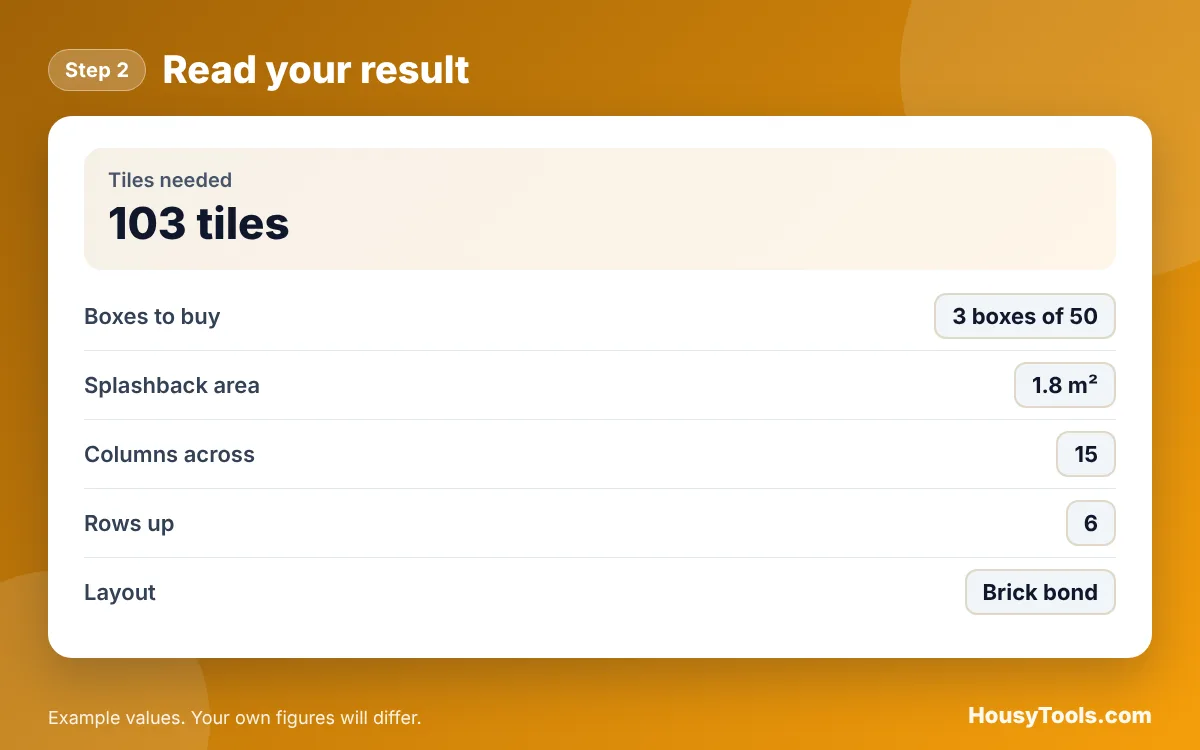
A 3 m long splashback 600 mm high needs about 103 metro style tiles of 200 by 100 mm in brick bond, including 10% wastage, or about 66 tiles of 300 by 100 mm in a grid. Smaller tiles need many more pieces and more grouting.
| Tile size (width x height) | Columns x rows | Grid, with 10% | Brick bond, with 10% |
|---|---|---|---|
| 100 x 100 mm | 30 x 6 | 198 | 202 |
| 150 x 75 mm | 20 x 8 | 176 | 181 |
| 200 x 100 mm | 15 x 6 | 99 | 103 |
| 300 x 100 mm | 10 x 6 | 66 | 70 |
| 300 x 600 mm (portrait) | 10 x 1 | 11 | 11 |
All figures are for a 3 m by 0.6 m splashback with 2 mm joints. For whole walls and floors, the tile calculator works by area.
What Is the Best Layout for Splashback Tiles?
Brick bond, where each row is offset by half a tile, is the classic layout for rectangular metro tiles, while a straight grid suits square tiles and gives a more modern look. Brick bond needs slightly more tiles, because every other row starts and ends with a half tile. Rectangular wall tiles of this kind are often called subway or metro tiles. Herringbone and vertical stack layouts are also popular but need more cutting and a higher wastage allowance.
How High Should a Kitchen Splashback Be?
Most splashbacks run from the worktop to the underside of the wall cupboards, which in many kitchens leaves a gap of a few hundred millimetres, or go up to a cooker hood behind the hob. Measure your own kitchen rather than relying on a standard height, and plan whole rows so you do not end with a thin sliver of tile under the cupboards. The calculator warns you if the top row would be less than a third of a tile.
How Much Grout and Adhesive Do I Need for a Splashback?
A splashback is a small area, so one small tub of wall tile adhesive and one bag of grout usually cover it, but the exact amount depends on the tile size, joint width and depth. Narrow joints of about 2 mm are common on wall tiles; follow the tile maker’s advice. The grout calculator and the tile adhesive calculator work out both from the area. Grout itself is described in Wikipedia’s grout article.
Worked Example: Metro Tile Splashback Along a 3 m Worktop
Example: a splashback along a 3 m worktop is 0.6 m high, tiled with 200 by 100 mm metro tiles in brick bond with 2 mm grout joints. No area is left out, 10% is added for wastage, and the tiles come 50 to a box. These are the calculator’s default inputs.
- Columns: 3 m / (200 mm + 2 mm) = 14.85, so 15.
- Rows: 0.6 m / (100 mm + 2 mm) = 5.88, so 6.
- Grid: 15 x 6 = 90 tiles, plus 3 for the offset rows = 93.
- With wastage: 93 x 1.1 = 102.3, so 103 tiles.
- Boxes: 103 / 50 = 2.06, so 3 boxes.
Three boxes hold 150 tiles, which leaves plenty of spares for future repairs. Laid as a grid instead, the same tiles need 99.
Kitchen Splashback Tile Calculator FAQs
How do I measure a kitchen splashback for tiles?
Measure the length of each wall run above the worktop and the height from the worktop to the underside of the wall units or the hood. Add up the lengths if the splashback turns a corner. Measure in metres and note any windows or panels.
Should I deduct sockets from the tile count?
No. You tile round sockets and switches by cutting tiles, so they do not save whole tiles. Only deduct large areas such as a window or a glass or steel panel behind the hob, using the area to leave out field.
How much wastage should I allow for splashback tiles?
About 10% suits most straight splashbacks, covering cuts at the ends, around sockets and a few spares. Allow more for herringbone, diagonal layouts or handmade tiles that vary in size and colour, where you will reject some pieces.
Why does brick bond need more tiles?
In brick bond each row is offset by half a tile, so every other row has a half tile at each end. Those two halves usually come from one extra tile, so each offset row needs one more tile than a grid row. The calculator adds this before wastage.
Do I need to tile behind the hob?
Behind a hob you need a heat resistant, easy clean surface, and tiles are a common choice. Check the hob and cooker hood makers’ instructions for clearances and approved materials, especially for gas hobs and glass panels.
Can I tile over existing splashback tiles?
Tiling over sound, firmly fixed tiles is sometimes possible with a suitable primer and adhesive, but it adds thickness at sockets and worktop edges. Check the adhesive maker’s guidance, and remove any loose or cracked tiles first.
Checked October 2026. Sources: Wikipedia: Subway tile, Wikipedia: Grout. Tile sizes, joint width and tiles per box are editable examples.